Editor’s Note: Kurt and Teresa Pennington are members of LTV’s sponsored content team, The Leisure Explorers. Do you own a Leisure Travel Van and enjoy writing? Learn more about joining the team.
For us, 2020 still included quite a bit of travel in our Unity, but downtime also included some enhancements and upgrades. Many of the enhancements were simple and can be done in minutes. We did make a trip to Elkhart, Indiana, for a major upgrade, but we took on the task of completing two additional upgrades ourselves. While these two do-it-yourself projects are slightly more involved, they just require a little bit of time and some common tools, and may be perfect DIY candidates for you, too. Both provided us with a sense of increased comfort and safety while driving our Unity.
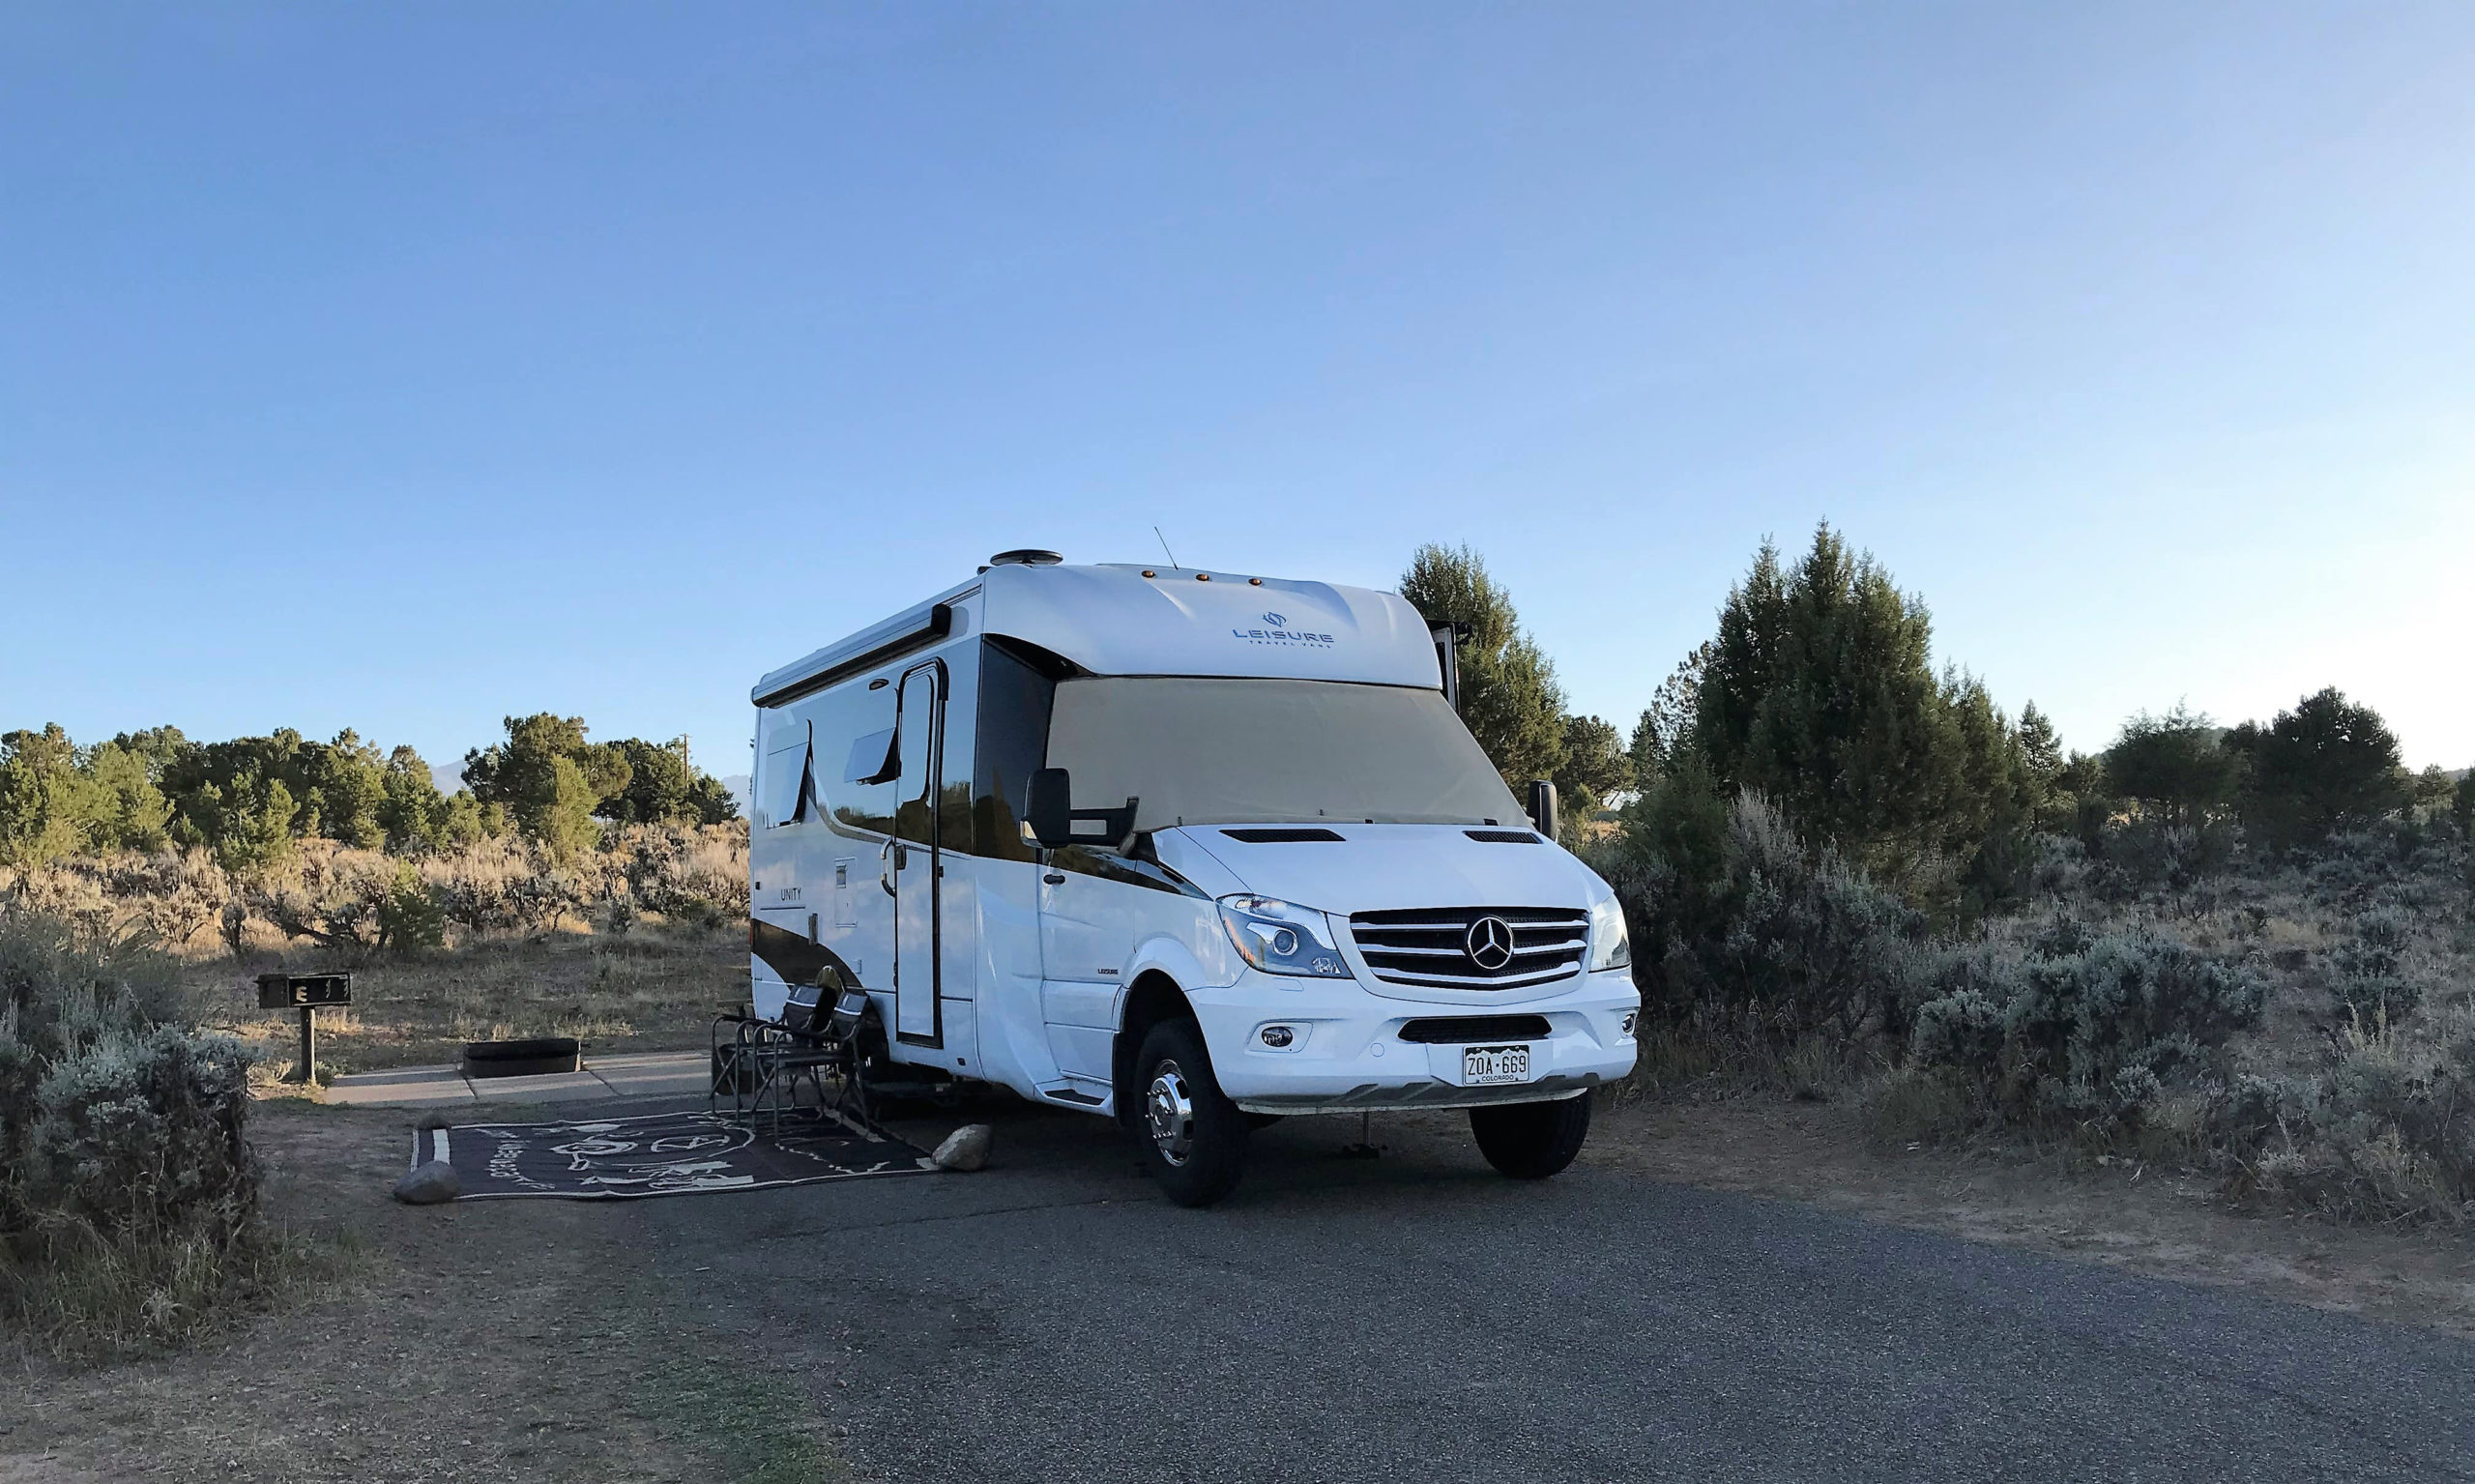
We own a 2016 Unity CB and have had it four years now… going on five. We never really felt the need to upgrade anything, as we purchased it with just about every upgrade component LTV offered at the time. But as we traveled more and more and met other owners, we realized there were some upgrades that could be added that would add to our driving comfort and safety.
More Bark
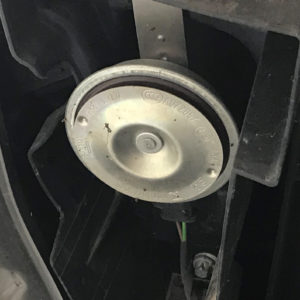
The first upgrade was to the factory-installed Mercedes horn. The Mercedes horn is not known for its ‘bark’… it’s more like a WEAK tweet. It really bothered me that I have this slightly large vehicle that takes a little longer to slow down or stop, but it only offered this little mini horn that didn’t quite command the respect I think it should! I wanted a horn that provided that big vehicle sound and would shock someone into taking it seriously. I began by researching various horn options, but wanted something that was easy to install and wouldn’t involve adding any extra electrical relays or other ‘special’ components. Most importantly, I wanted something loud.
I looked on Amazon and found some potential candidates, like the Wolo. But after reading various forums and such, it sounded as though some individuals had issues with connecting this option directly into the Mercedes electrical system. I could never really get a clear understanding of whether the steering wheel buttons became unusable or if others had needed to add an additional switch, or what, and to be honest, I just got tired of trying to figure it out. In reality, I believe it would have worked okay and I know of at least one individual who has installed the Wolo brand in their LTV, but I wanted something I was 100% sure would work without issue.
In the end, I decided on a pre-packaged horn unit from Agile Offroad. They make and sell various accessories for Sprinter, Transit, and Winnebago vans. They provide everything from suspension kits, lighting, and racks, to wheels and horns! Most of their accessories are more geared to the van style of vehicle, but the horn package is perfect for the Mercedes chassis. They have two versions of the horn package, depending on the year of your chassis. Since ours is a 2016, we went with the Agile Horn Upgrade Kit for the Sprinter 2007-2018. They also offer one for the 2019+ chassis.
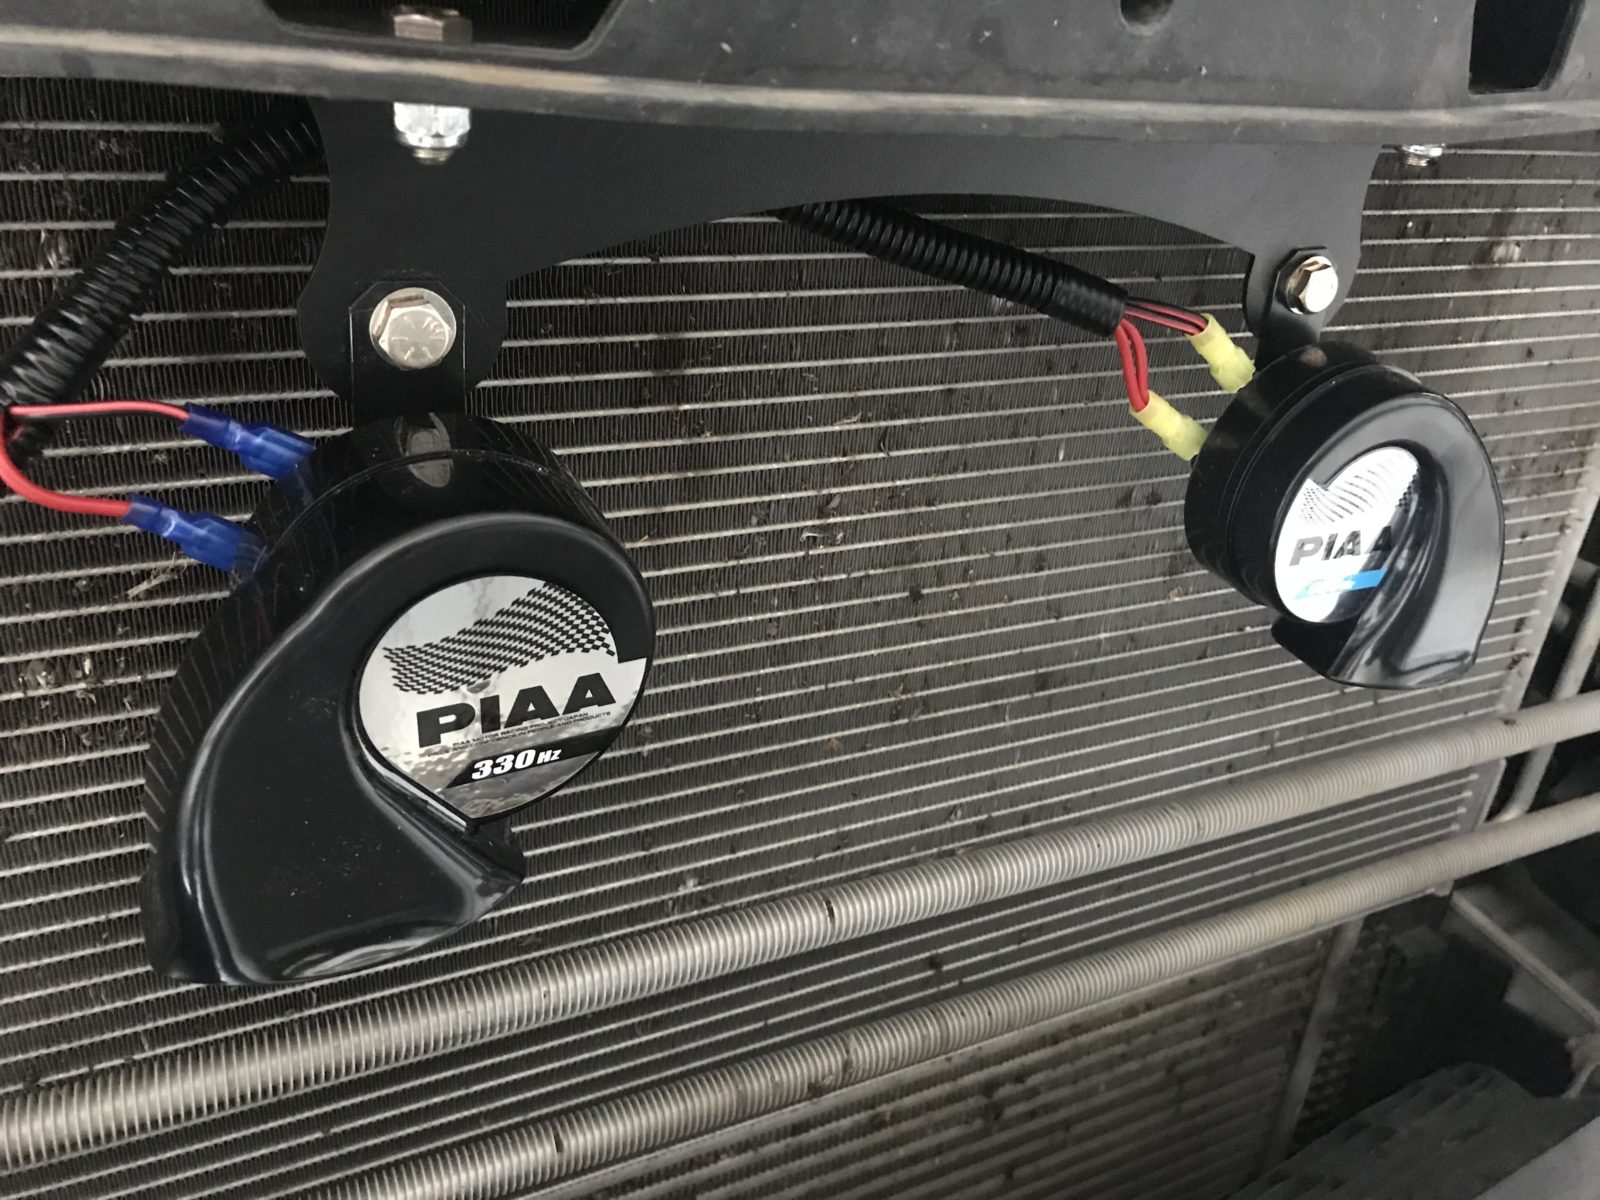
The kit consists of two PIAA bass horns, a bracket and hardware to mount and secure the horns, and an easy-to-install wiring harness. The twin horns are rated at a loud 112 decibels and two different tones of 330 Hertz and 400 Hertz… if you want to get nerdy about it. You could purchase the same horn on Amazon, but if you want the ease of the wiring harness and mount bracket, just spend the extra money and buy the kit.
Agile Offroad provides easy-to-follow instructions and, besides your own tools, everything is included. The tools required for the job were a T-25 Torx bit, a drill with a 3/8-inch drill bit, wire cutters, and a socket set and crescent or open-end wrench. Though the kit provides some crimp connectors, I also wrapped those with electrical tape to keep out any moisture, and used some Blue Loctite on the hardware to ensure they don’t come loose. There are also various videos on YouTube of others installing the kit. I would recommend watching at least one of these, as it gives some insight on how to access and unlatch the lower clips on the front grill. It was easy enough to do, but it’s easier to understand once you watch someone else do it. This is a good video example.
The next few images have some tips and show my arrangement.
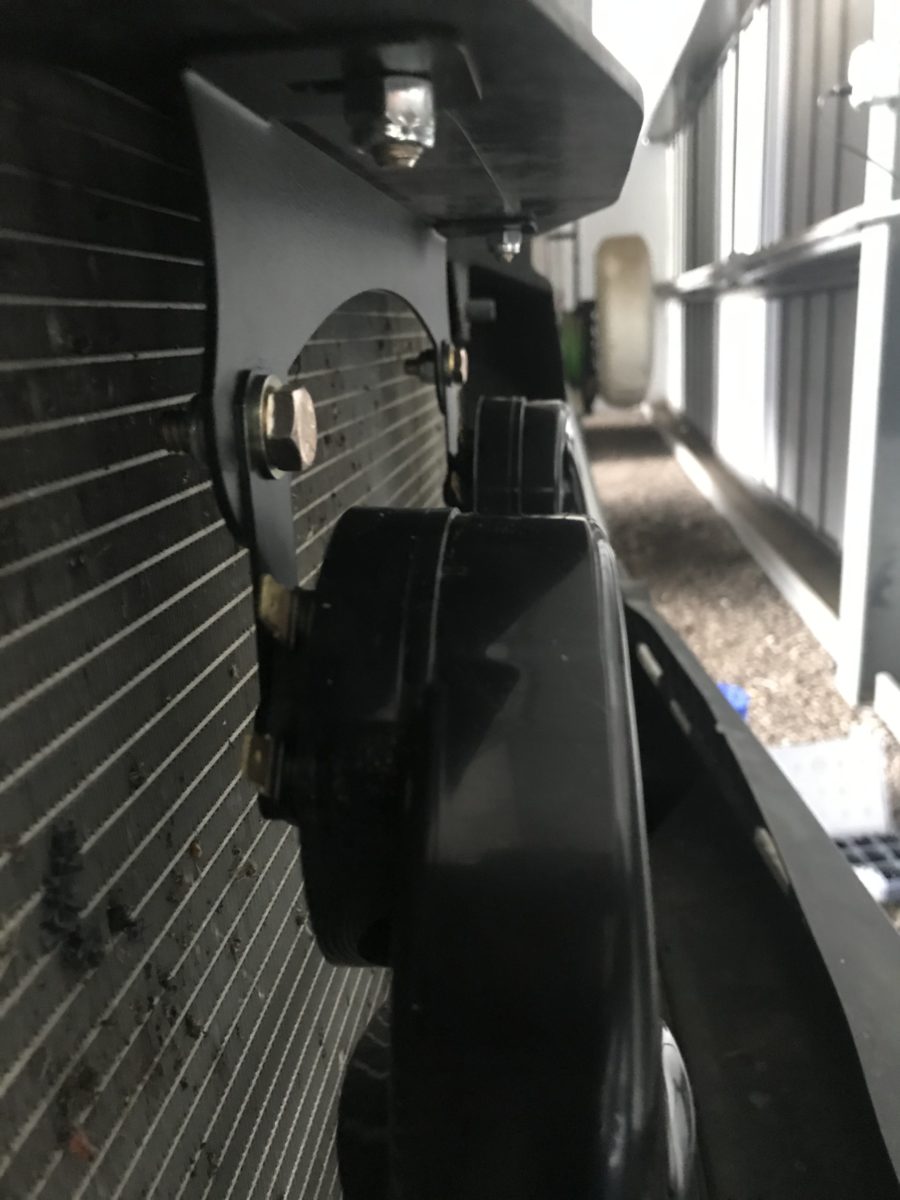
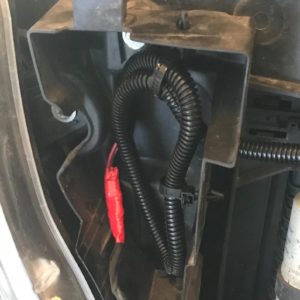
All in all, the entire project took me about 30 minutes. I removed the original Mercedes horn and placed the bulk of my excess wiring harness in its location. I made sure to secure the excess wiring with some zip-ties. The Mercedes radiator shroud is all plastic, so drilling the mounting holes with the 3/8-inch drill bit is quite quick. If you’re looking for an easy way to improve the volume of your horn, I believe this kit will do it for you! Listen for yourself…
Less Wag
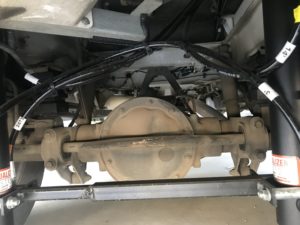
The other DIY project we undertook was to improve the stability of our 2016 Unity by replacing the factory original rear sway bar (also called an anti-roll bar), with a much stiffer after-market sway bar. Many owners have done this upgrade and it’s also easy enough to do yourself, though I wouldn’t expect it to cost much for a local shop to perform. Again, this project should take less than an hour with the proper tools. One tool in particular that is required is a torque wrench capable of 75-90 ft-lbs. A breaker bar is also beneficial, and you’ll need a socket size of 18 mm. If you’re not familiar with the benefits of the sway bar on your chassis, here is a short video to watch.
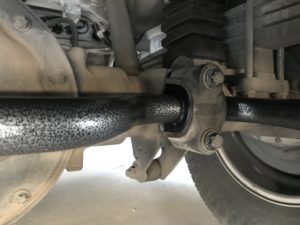
The sway bar that I purchased seems to be very popular among the Sprinter van-based RV community. It’s the Hellwig 7254 Rear Sway Bar kit for the years 2008-2018. I actually purchased mine from Amazon. As you can see in the following photos, it is significantly thicker in diameter than my factory sway bar. With that said, I know the newer model Mercedes chassis comes standard with a thicker sway bar, but I don’t know how it compares to this Hellwig model offered for the 2019-2020 chassis models.
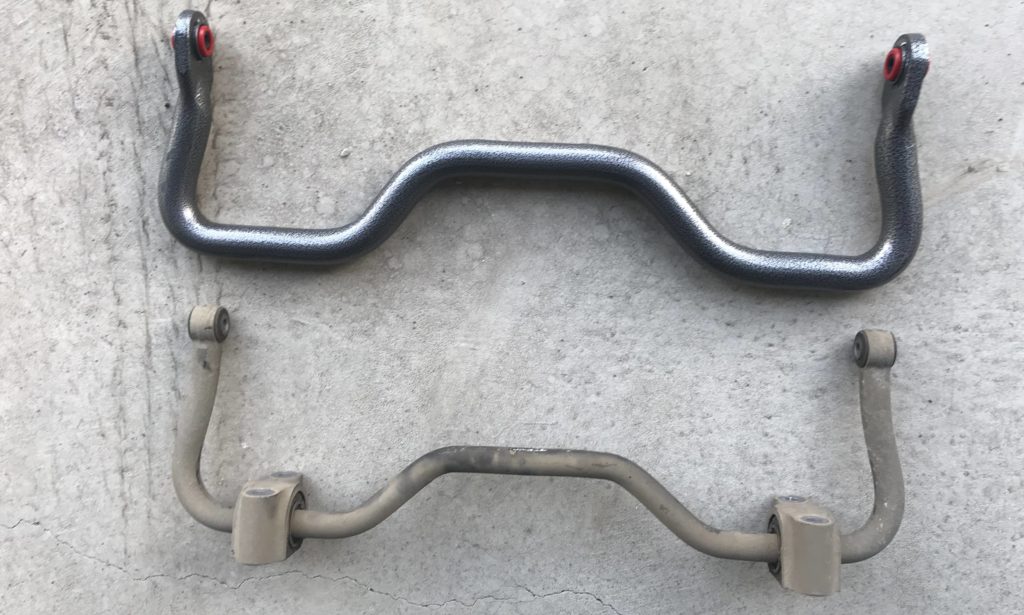
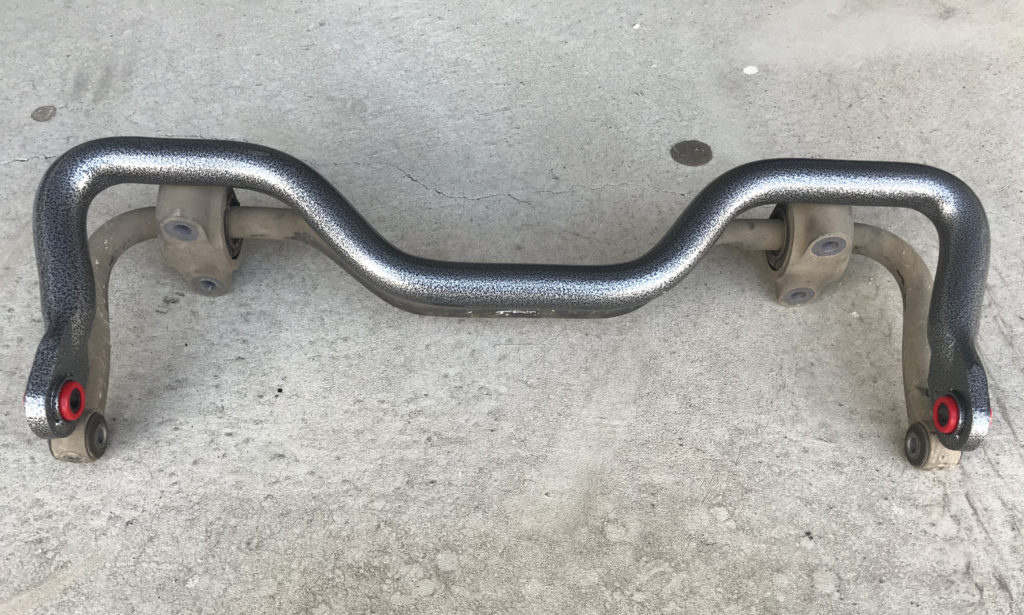
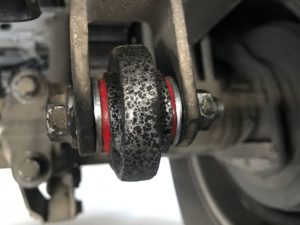
As with the horn kit, the Hellwig sway bar kit comes with all the necessary parts and a good set of instructions. My kit came with new bushings, silicon grease, and Blue Loctite, but used the original U-plates (castings). It appears the new kits come with everything mine came with and NEW U-plates!
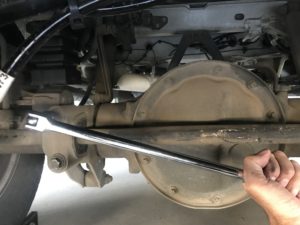
Installation is fairly easy. I found the most difficult part was squeezing under the chassis with limited space that made it difficult to get the required leverage to torque the hardware. The sway bar has some weight to it, so you might want to employ the help of a friend to assist. The Hellwig components appear to be of higher quality than the factory Mercedes parts. Besides the bar being significantly beefier, the bushing seems of much better quality than the original.
Conclusion
Overall, I considered both upgrades easy to do. Yes, I could have hired someone, but I figured I saved some cost, and to be honest, I just feel more comfortable with the quality of my work than others. From the standpoint of safety and comfort within the vehicle, I feel they are huge improvements. The sway bar was immediately noticeable. Being that we reside in Colorado, many of our trips take us through winding mountain paths, and I’ve noticed a significant reduction in lean and sway on the mountain roads. Not that I drive fast, but I have noticed that the vehicle feels much more secure and tight through the corners.
Just so there is some transparency here, we also have Sumo Springs installed on the front and rear. The Sumo Springs were installed before the sway bar and they also made a huge improvement in sway, but with the addition of the Hellwig sway bar, even more stability was immediately noticeable. Some may argue you don’t need both, and many other suspension systems upgrades are available and may provide the same benefits or better, but for a relatively quick and inexpensive solution, we are very pleased with the upgrades we’ve made.
Take care and happy travels! If we see you on the road, we’ll honk… LOUDLY!!


Comments